Your first storefront
Create a storefront, put one service on it, publish it and share the link.
This walks the whole way through once, with one service, so you can see what a guest gets before you spend an afternoon on your real catalogue. Ten minutes is enough.
1. Create the storefront
Open Storefronts and press Create storefront. Three things to fill in:
- Attach to — the property this storefront is for, or Whole workspace. If your workspace has exactly one property, this is already filled in and there's nothing to choose.
- Name — what your team will call it in the list, e.g. "Spa offers". Guests see it as the title of the page, so keep it presentable.
- Currency — the currency all prices on this storefront are shown in.
Press Create storefront. It opens straight away in the editor, as an empty draft.
You don't set the web address yourself
The address of the public page is made from the name and can be changed afterwards in the storefront's settings — you don't have to think about it while creating.
2. Meet the editor
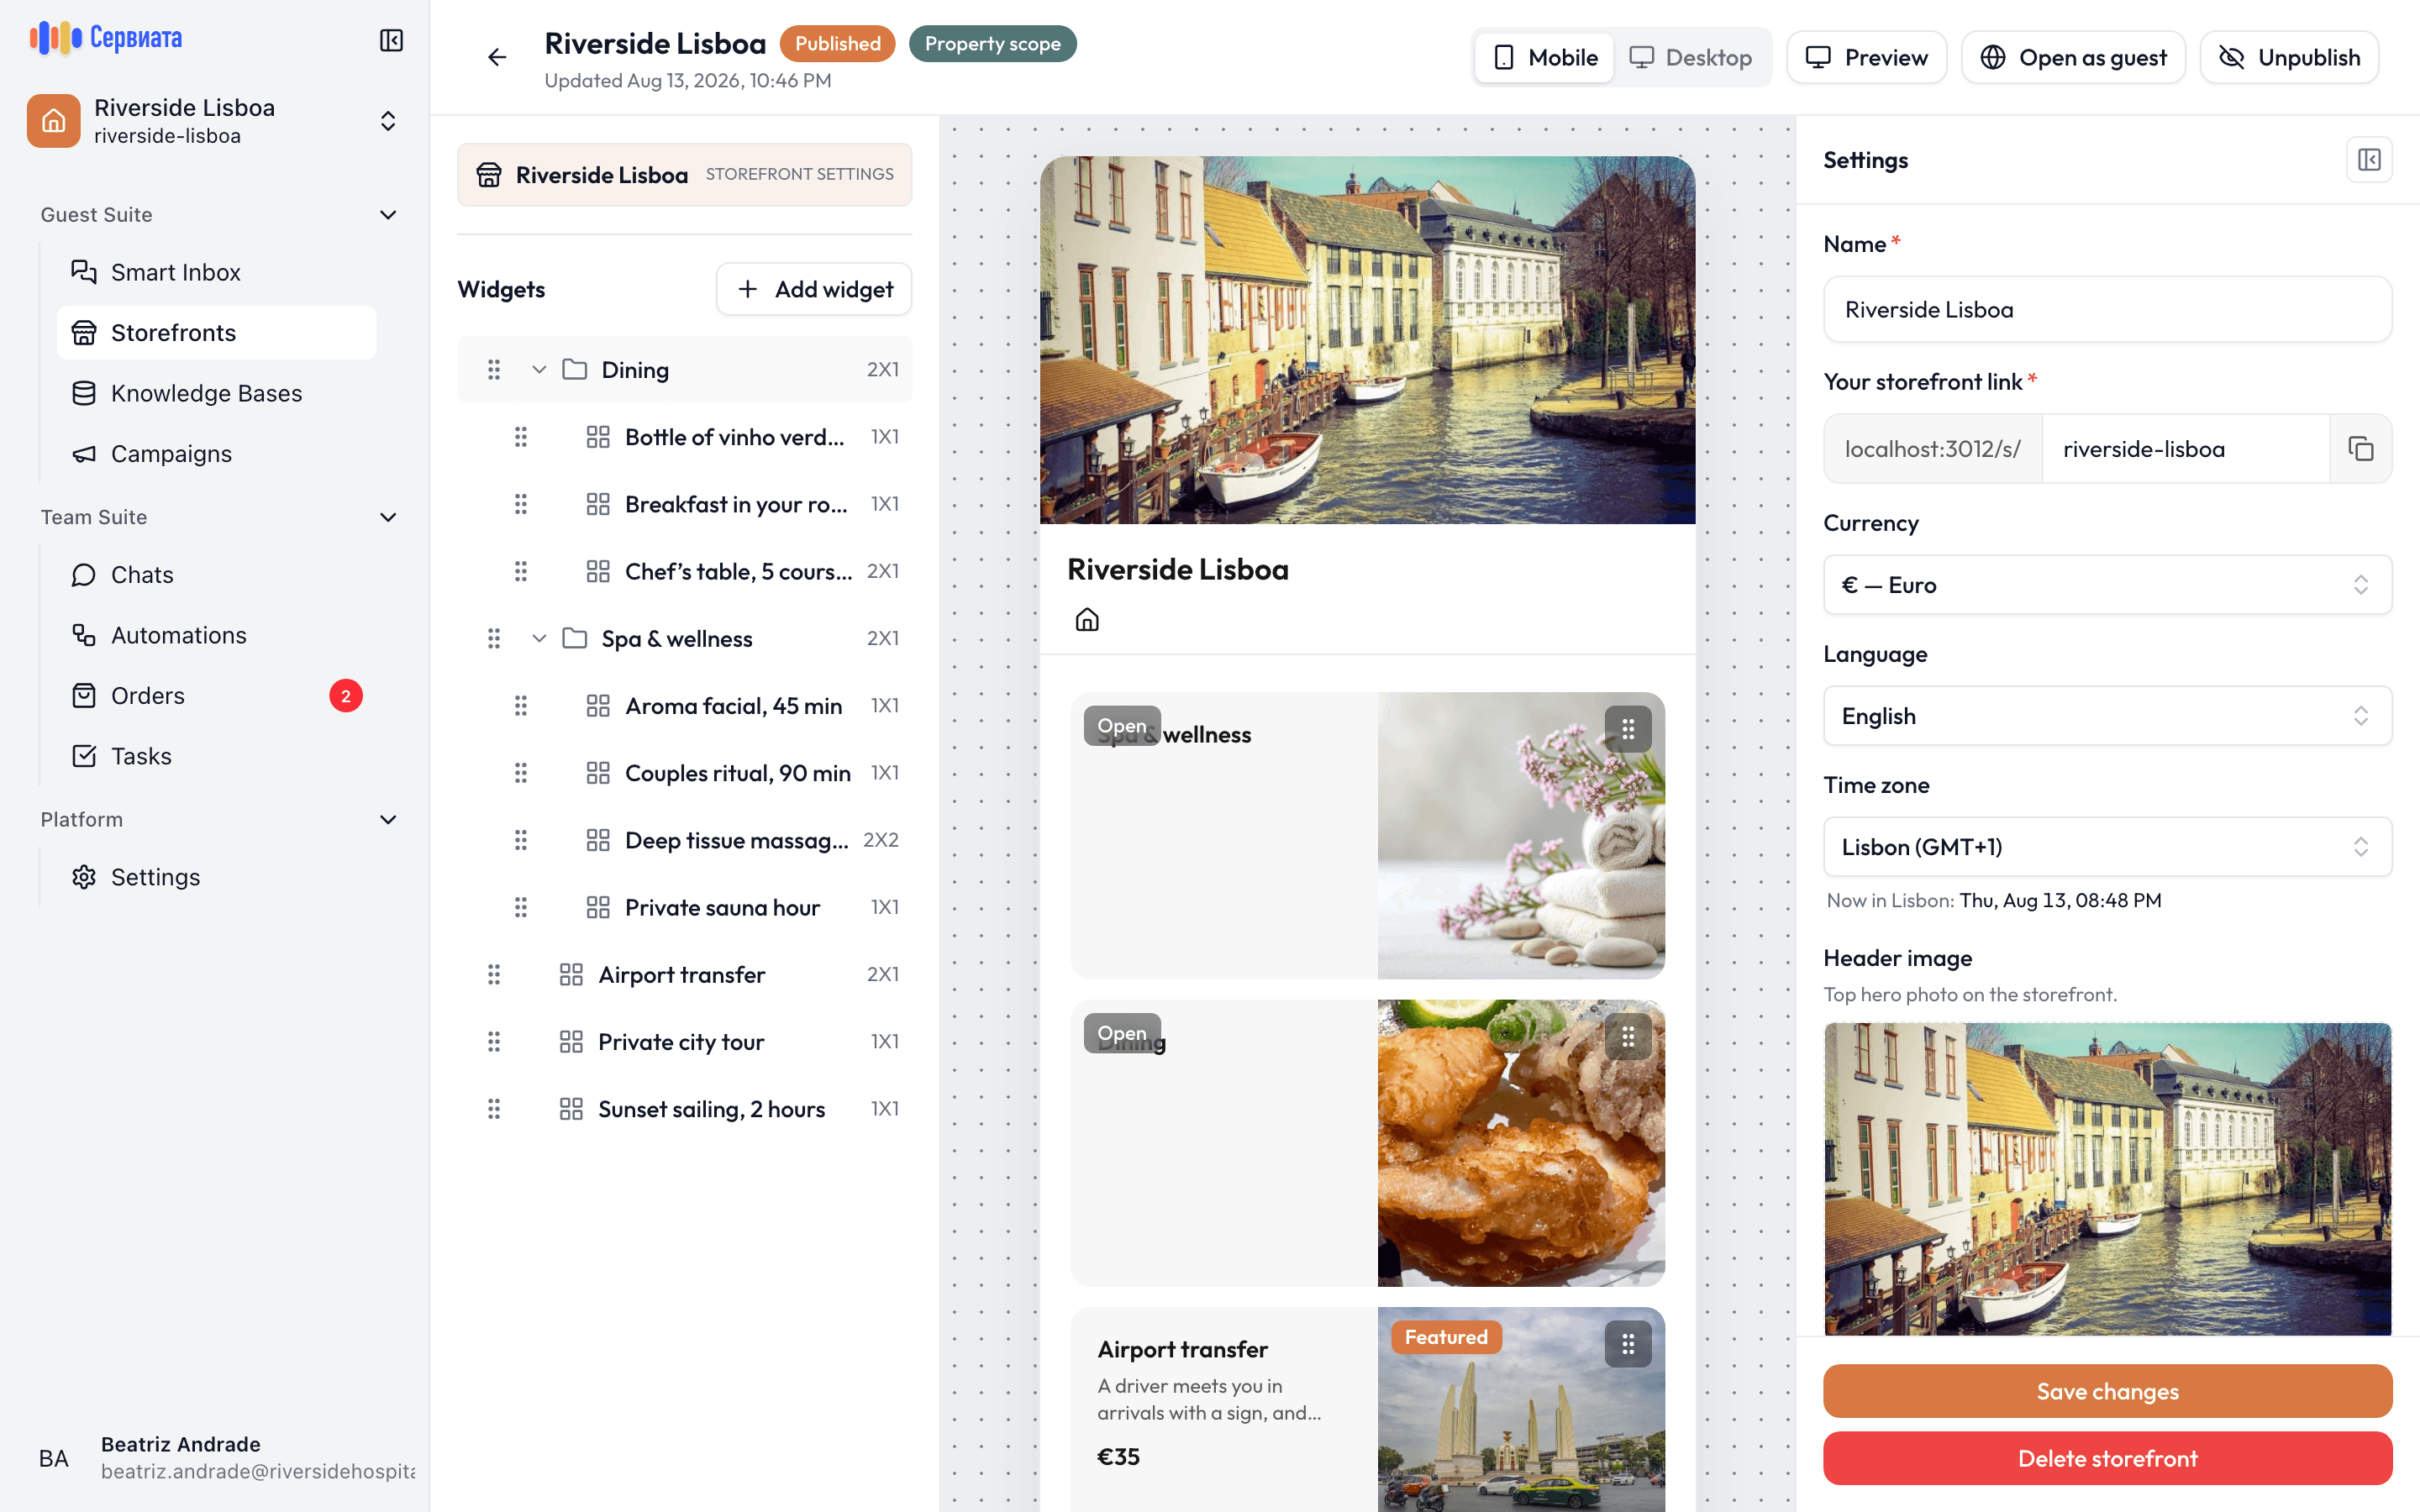
- 1
- 2
- 3
- Left — the storefront settings and the list of cards
- Middle — the page itself, as a guest gets it
- Right — the Inspector, showing whatever is selected
The editor has three parts, and it's worth a few seconds to place them:
- Left — the storefront's contents: Storefront settings at the top, then Widgets, the list of cards on the page.
- Middle — the page itself, exactly as a guest sees it. It's live: you can click cards here as well as in the list.
- Right — the Inspector: everything about whatever is currently selected. On a fresh storefront that's the settings.
The Mobile / Desktop switch at the top changes the middle pane between the two shapes. Most guests will open your page on a phone, so Mobile is what you're shown first.
3. Add a service
Press Add widget above the list on the left and choose Service. A card appears on the page and the Inspector switches to it.
Fill in, on the General tab:
- Title — what the guest reads, e.g. "60-minute massage".
- Description — a sentence or two. Optional, but a card with nothing under the title looks unfinished.
- Pricing and Price — leave it as Fixed price and type an amount. The currency is the one you picked when creating the storefront.
Then give it a picture: under Cover image, press + Add and choose a photo. Photos do more for a storefront than any other single thing — a card without one is a grey box in a page of them.
Save changes at the bottom of the Inspector. The card in the middle updates as you go.
4. Look at it as a guest will
Press Preview in the top bar. It opens the storefront in a new tab, without the editor around it, so you see the real thing: the header, your card, the price.
Click your service there. This is the detail page a guest reaches — the picture, the description, the price, and the button that starts an order. If it reads well here, it will read well from a QR code in a room.
5. Publish and share
Back in the editor, press Publish. The badge next to the name changes to Published, and Open as guest — greyed out until now — becomes available. That button opens the live page at its public address.
To get the link itself, select Storefront settings on the left. Your storefront link shows the
address in two pieces: the fixed part of the address, then the ending you can edit — change it to
something a person could read out, like spa-offers. The button at the end of the field copies the
whole link. That's what goes into your QR code, your messages, and the card in the room.
6. Wait for the first order
When a guest completes an order it appears in Orders, with what they chose, what they wrote, and how to reach them.
One thing to check before you hand the link out: Orders has to be in your sidebar. A new workspace gets Storefronts switched on but not Orders, and while Orders is off nobody can read what guests have sent. Orders explains how to have it switched on.
Where to go next
- Services and sections — groups, sizes and layout, and every field a service card has.
- What a storefront is — scope, draft and published, and who on your team can edit.